

I tried several things and lately I’ve found this. That makes 1-2 months that I use the MailChimp plugin and SumoMe and that’s cool.
This was a year that I was using MailChimp, the website is really effective but to integrate it in my blog was complicated. Do copy/paste of source code that doesn’t really work, it was frustrating but I use the free version. SumoMe, I only knew the name because of Tim Ferriss, that’s all.
To begin, you create a SumoMe’s account to connect it to your blog, it will be useful later.
To build your subscriber list, get theirs emails and send them your newsletters, you need to have a MailChimp account . Then downloads and activates the MailChimp’s plugin in WordPress . The plugin was created by Danny Van Kooten.
Once that’s done, you’ll have a « MailChimp for WP » menu. Click on the menu and insert your MailChimp « API Key » for the plugin connects with your website MailChimp account :
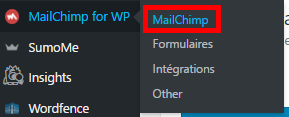
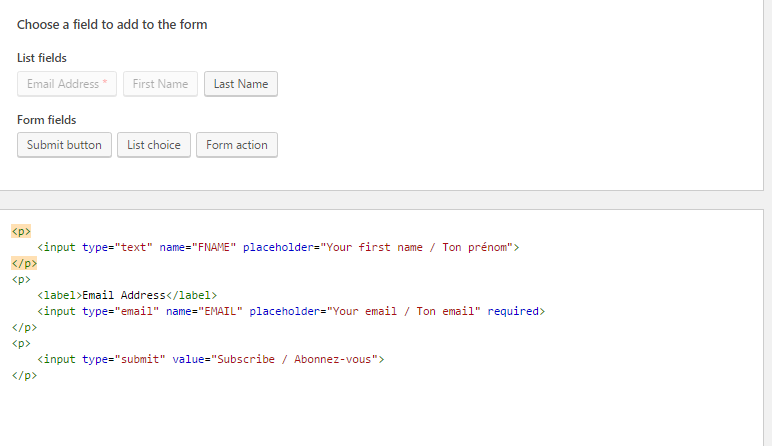
Then click on « Forms » (« Formulaires » is form in french). To change form’s appearance, click on « Appearance » tab (« Apparence » is appearance in french). To configure form’s content, click on the « Fields » tab (« Champs» is fields in french):
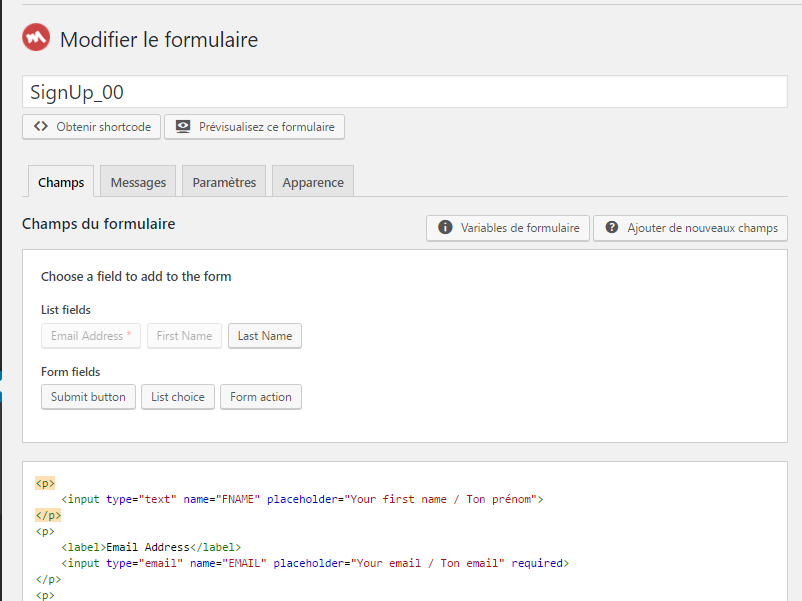
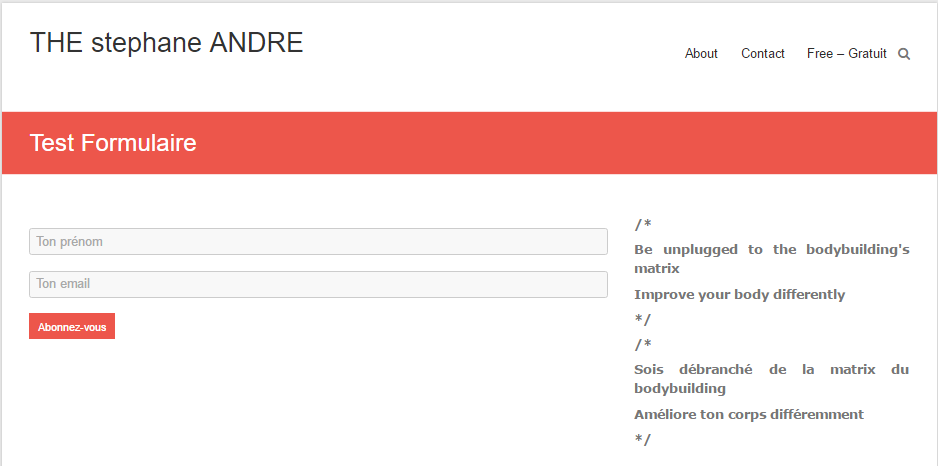
Here is the area to configure your form :
Delete the source code :
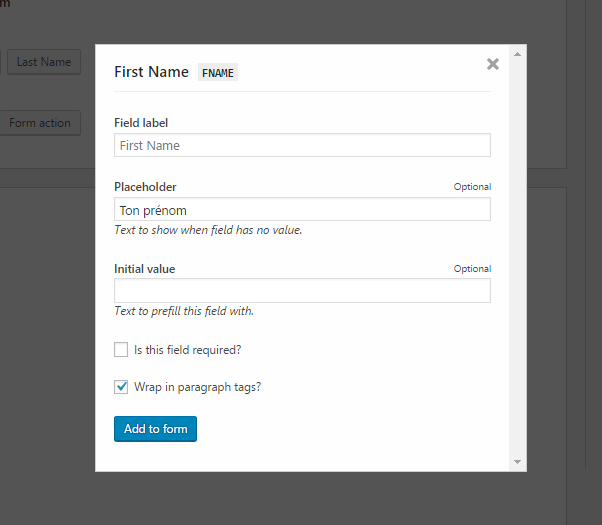
Now, all text fields buttons are enabled. Click on « First Name » button for the first name. If you don’t a title above the text fields, you can erase the contents of the text field « Field Label » and write in the field « Placeholder », « Your first name » («Ton prenom» is your first name in french), it will appear in the text field. Then click on the « Add to form » button :
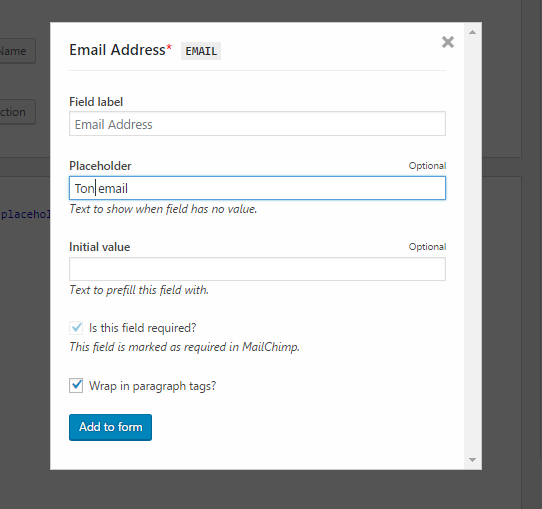
Same for the email («Ton email» is your email in french) :
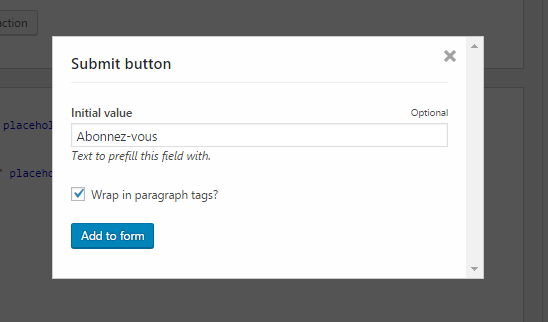
Same for the button to subscribe («Abonnez-vous» is subscribe in french) :
Once the form completed, click on the button « Save changes » (« Enregistrer les modifications» is save changes in french) :

After saving, there is a code below the button :

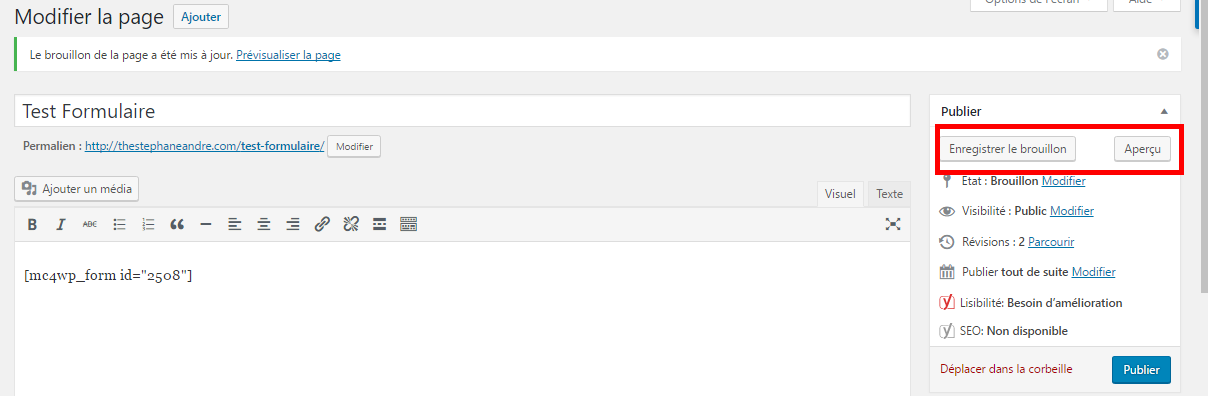
Copy this code and create a « Page » in WordPress to test the form. Click on button « Save Draft » (« Enregistrer le brouillon » is save draft in french) and click on « Preview » button to see the form (« Apercu » is preview in french):
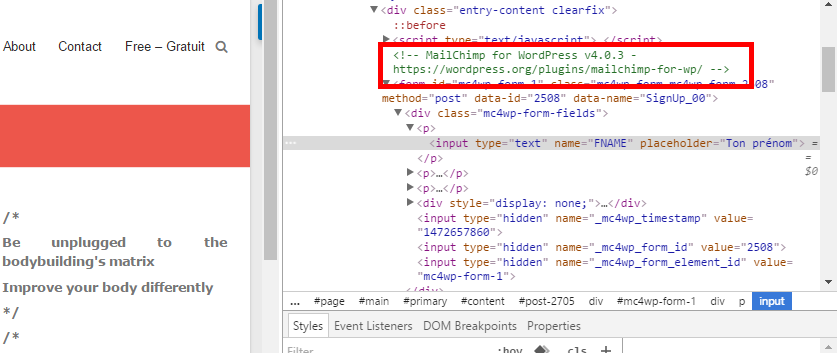
Now this will be a bit technical, we will take the form’s HTML code. The easiest is to right-click in the text field « Your name » (« Ton prenom» is your name in french) and select « Insptect » (« Inspecter » is inspect in french). I use Google Chrome but I think it’s possible to do the same with Firefox or Edge :

The web page’s source code will appear :

Now you will find the source code’s beginning of WordPress form. This is the commentary written in green which indicates the beginning of the code :
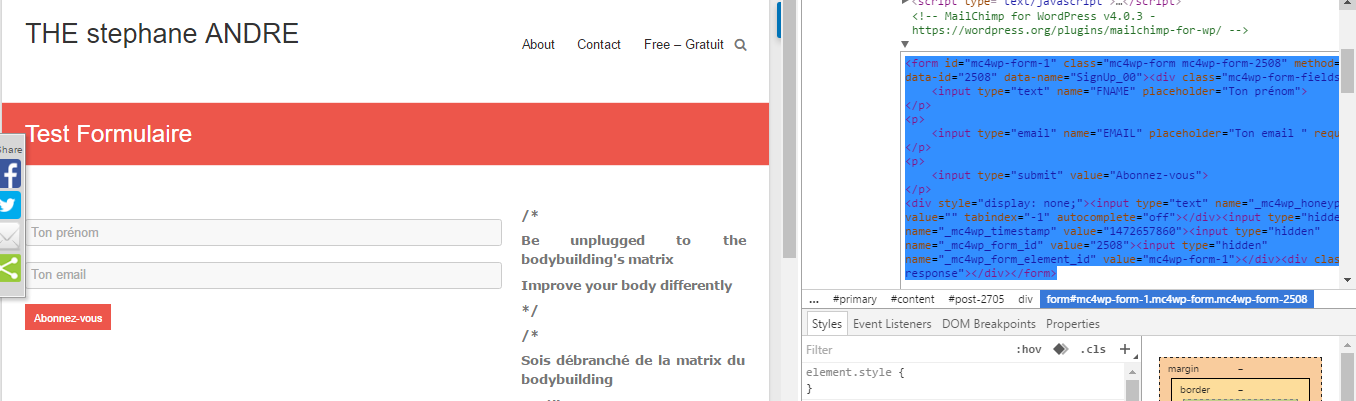
Selects the line below the text written in green (the comment), the form will be highlighted, right-click it and select « Edit as HTML » :

Copy all the source code in the box :
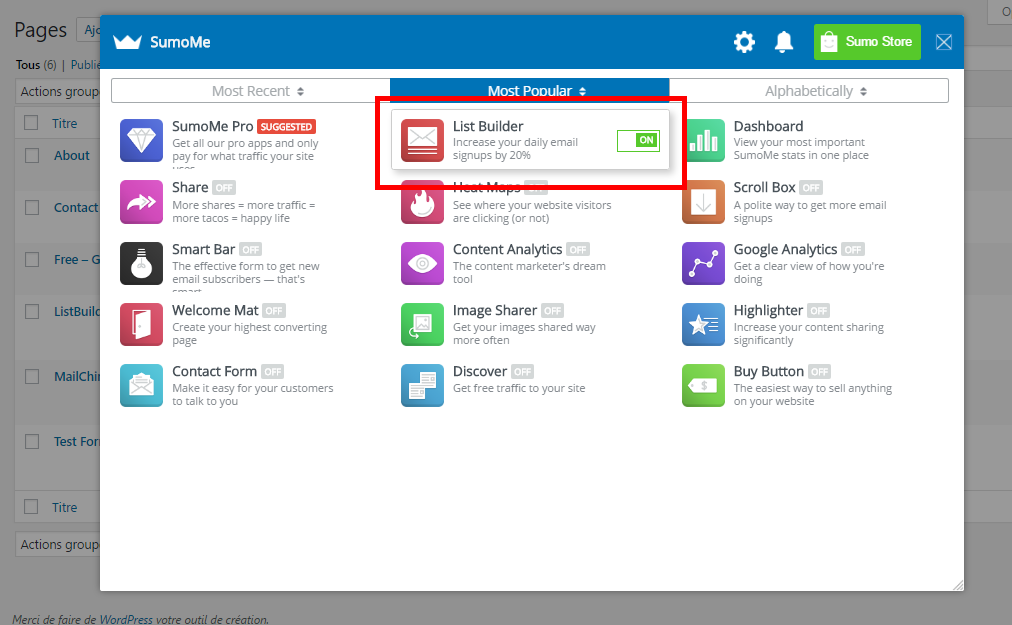
Opens « SumoMe » from your blog :
![]()
Click on « List Builder » :
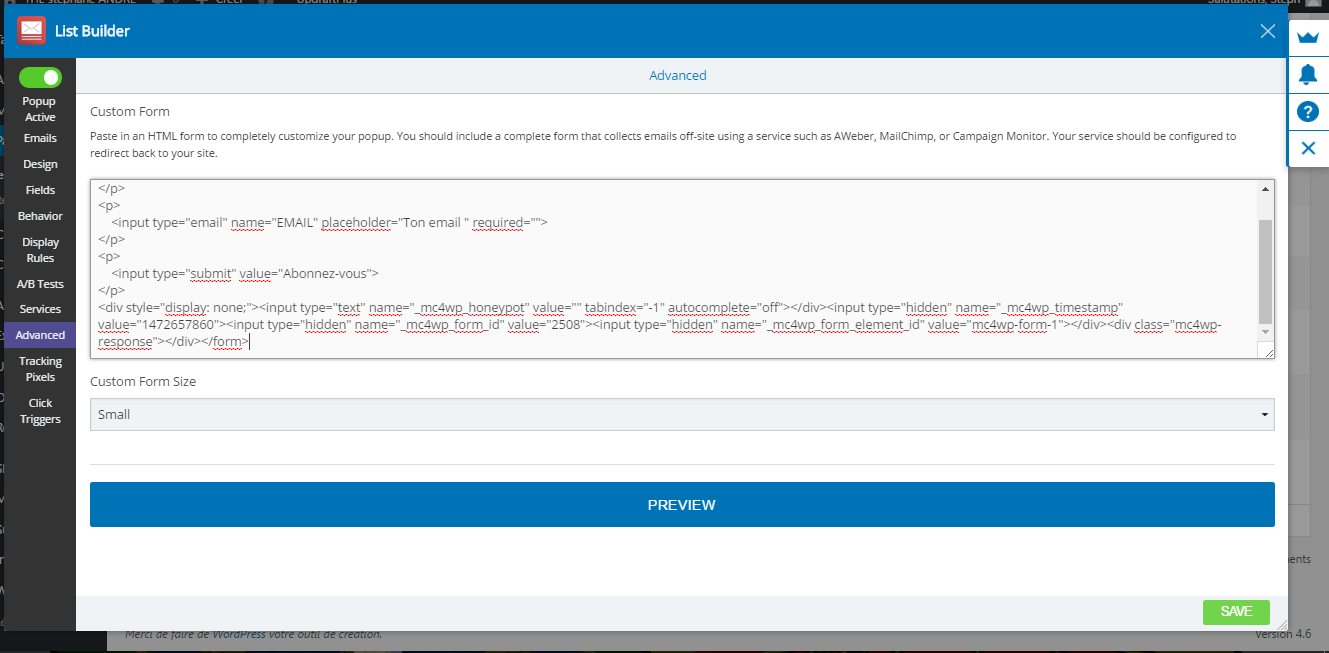
Click the « Advanced » menu and paste the source code in « Custom Form HML » and click on the “PREVIEW” button to see the form and the button « SAVE » :
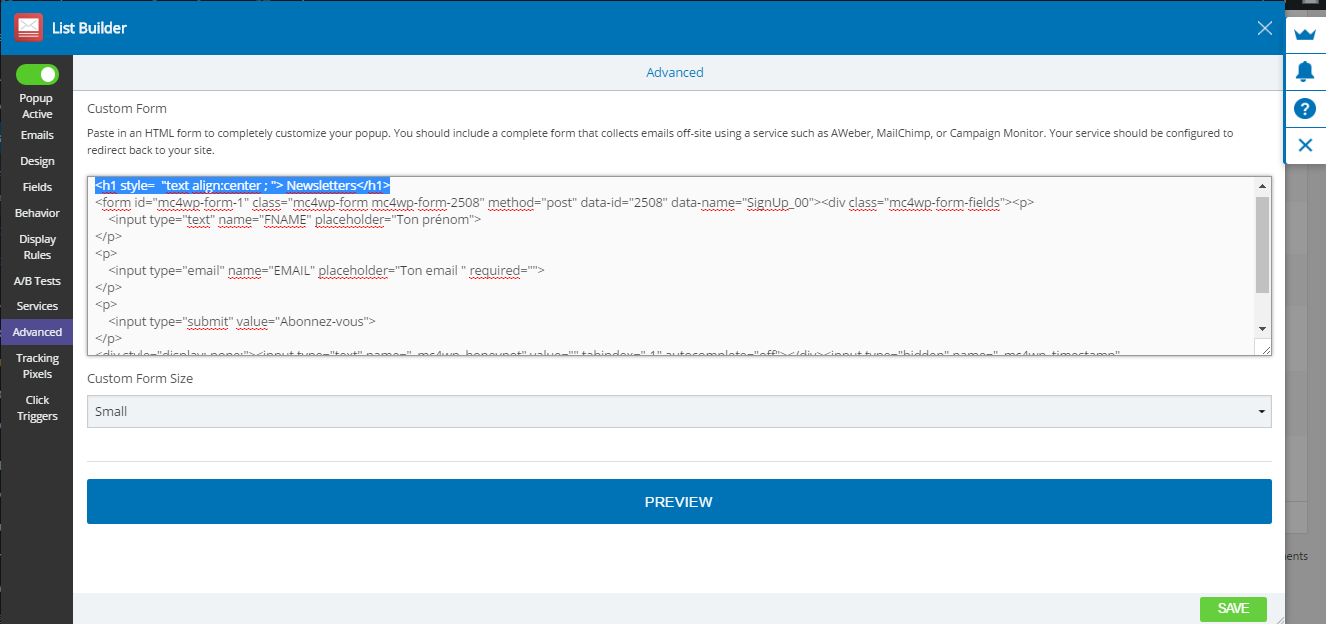
At the beginning of the source code, add this line to have a title
<h1 style = “text align: center;”> Newsletters </ h1>
and click on the button « SAVE » :
Go to your blog and test the pop-up subscribers to register. Checks on the MailChimp website that the subscriber was registering in the compaign.
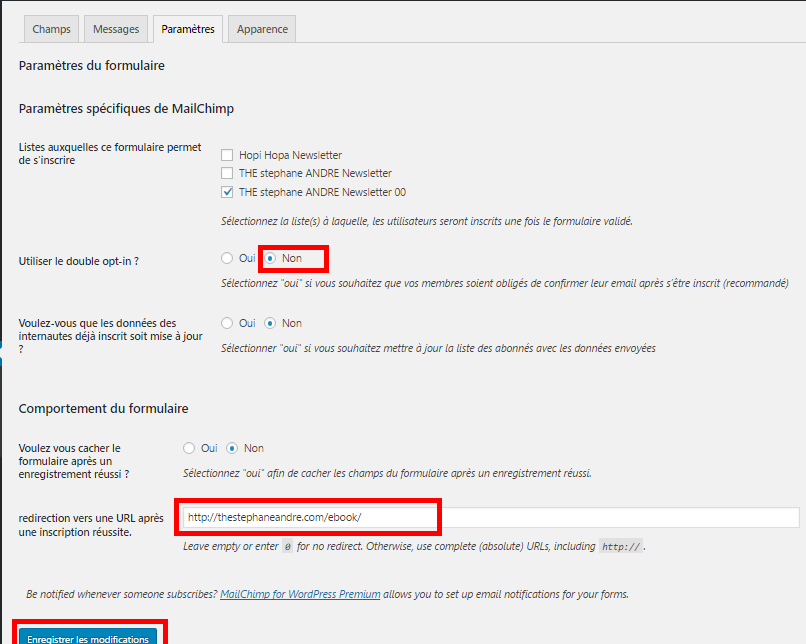
After your test, you can go to WordPress, on the Menu « MailChimp for WP » => « Forms ». Click on the « Settings » tab (« Parametres» is settings in french). Select NO to the « Double Opt-In ». The « Double opt-in » is the confirmation by email. Changes the URL for the subscriber to have a thank you page and click on the button « Save changes » (« Enregistrer les modifications » is save changes in french) :
In WordPress, the menu « Appearance » => « Widget », you can use the form that you just created
(« Formulaire d’enregistrement à MailChimp » is MailChimp Sign-Up form in french):

These two website are very convenient, it’s cool.
And you ? How you build your subscriber list ?
-Steph